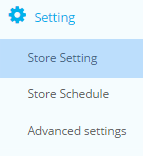
Store Settings

To access the ​ Store Settings​ tab, click on ​theSettings​ and then on ​ Store Settingstab below

On this page, you are able to adjust the specific settings for your store. There are plenty of options, so please read them carefully before using them.

Store Name:​ This will be the name displayed for your store on the website

Contact Name: ​: Name of the person to be contacted for your store

Contact Email:​ Email address of the person of contact for your store.

Address:​ Complete address for the store.

Change Logo: This allows you to upload your company’s logo to appear on your dashboard and that of your employees.

Automatic Reply Message: ​This message will automatically be sent whenever a customer sends a message to the store’s number.

Unsubscribe Instructions:​ This message explains to the customer how to unsubscribe from receiving messages from the store.

Unsubscribe Succeeded Message: ​The message that will be sent to customers who have unsubscribed once their request has been completed

Store Schedule

To access the ​ Store Schedule​, click on ​the Settings​ and then on ​the Store Schedule tab.

This page will allow you to select the store’s business hours and add any holidays that will affect those hours.

The top section of this page shows your store’s regular business hours. Below, there is a monthly schedule for the store, and you may add or edit any holidays to this calendar by using the Add or Manage tabs

Advanced Settings

To access the ​ Advanced Settings for your store, click on Settings​ and then select Advanced Settings.

Using this page, you can access many of the miscellaneous settings for your store.

Existing Customer:​ Any person who has previously messaged the store. To stop receiving notifications, the message from the existing customer must be read.

New Customer:​ Any person who is messaging the store for the first time. To stop receiving notifications, the message from the new customer must be responded to..

Customer Wait Minute:​The time allowed for the assigned salesperson to respond to a message before the message gets resent via the routing option

Customer Assign Type:​ ​ This option allows you to reroute messages if it is not responded to in the time allocation. You can Broadcast the message or have it send to everyone after the customer sends the initial message. Another option is to have the message set to a Queue system, which will cycle through your list of employees (until message is responded to) and will then reassign the customer to the employee that responds. There is also an option to have No Routing; this option will simply resend the notification to the selected salesperson until the message is responded to.

Email Notification: ​This is the amount of time from when the customer sends the message to when the salesperson is notified about the message via email

Archive Inactive Customers: ​The number of days a customer can be inactive before being moved to the Customer Archive tab. Upon activity, the customer will return into the Manage Customers tab

Admin acts as Sale Person: This allows the store administrator to also act as a sales person. This provides the store administrator the ability to have his or her own customers.

Store Phone (and Email):The phone number and email address attached to the store.